Introduction
Hardwood floors are identified with beauty, heat, and sturdiness. They can elevate the visual of any type of space, making it really feel more inviting and advanced. Nevertheless, mounting wood flooring is not a straightforward task; it calls for proficiency, accuracy, and the right tools. In this comprehensive overview, we delve into Innovative Devices and Techniques for Effective Hardwood Flooring Installation that can change a labor-intensive process into a smooth experience. From advanced devices to time-saving approaches, this write-up will equip you with all you require to find out about accomplishing that excellent hardwood floor.
Understanding Wood Flooring Installation
What is Wood Floor Installation?
At its core, wood flooring installment includes placing wooden slabs onto an existing structure-- whether it's a concrete slab or an old flooring system. The process can differ dramatically relying on variables like the sort of timber utilized, the subfloor problem, and the selected setup approach (nail-down, glue-down, drifting).
Types of Wood Flooring
- Solid Hardwood: Made from a solitary item of timber; very durable yet conscious adjustments in humidity. Engineered Hardwood: Composed of multiple layers; extra steady than solid wood. Reclaimed Wood: Sourced from older structures; eco-friendly but might require refinishing.
Preparation for Installation
Before diving right into installment, ensure your workspace is prepared:
Acclimation of Wood: Enable your wood slabs to accommodate in the room where they'll be set up for at the very least 48 hours. Subfloor Assessment: Look for dampness levels and flatness. You want a clean slate! Tools Checklist: Gather important devices such as saws, nail guns, and dampness meters.Innovative Devices for Efficient Wood Flooring Installation
Advanced Cutting Tools
Table Saws vs. Miter Saws
Using innovative cutting devices like table saws and miter saws can significantly increase efficiency.
- Table Saw: Offers precision cuts for lengthy planks. Miter Saw: Perfect for tilted cuts at corners.
Why Usage These Tools?
These saws enable cleaner cuts and lower waste by ensuring accuracy in measurements.
Nail Guns
Pneumatic Nail Guns vs. Battery-operated Nail Guns
Nail guns have actually transformed wood floor installment:
- Pneumatic Toenail Guns: Call for an air compressor yet supply regular power. Battery-operated Toenail Guns: Offer mobility without needing an air source.
Impact on Efficiency
With nail weapons, you can conserve time compared to manually nailing each slab while keeping high-quality results.
Moisture Meters
Moisture meters are crucial prior to starting any type of hardwood floor installation job:
- Ensure your subfloor isn't also damp or completely dry-- optimal moisture levels fall in between 6% to 9%.
Flooring Jack
A floor covering jack assists align planks flawlessly throughout setup:
- This device is specifically helpful for tight spaces where hands-on changes are challenging.
Techniques to Boost Efficiency
Pre-installation Planning
Layout Design
Prior planning on exactly how your boards will certainly be outlined can save you time:
Decide on the direction based on light sources. Make sure to startle joints; this adds stability.
Using Spacers
https://sethitvm.bloggersdelight.dk/2025/05/08/lasting-selections-eco-friendly-options-for-wood-floor-installment/Employ spacers between slabs during setup:
- This enables development gaps that protect against distorting later due to temperature changes.
Floating Floorings Technique
This method does not need adhesive or nails:
Lay down an underlayment first. Simply click the boards together-- the simplicity alone makes it popular!Post-installation Techniques
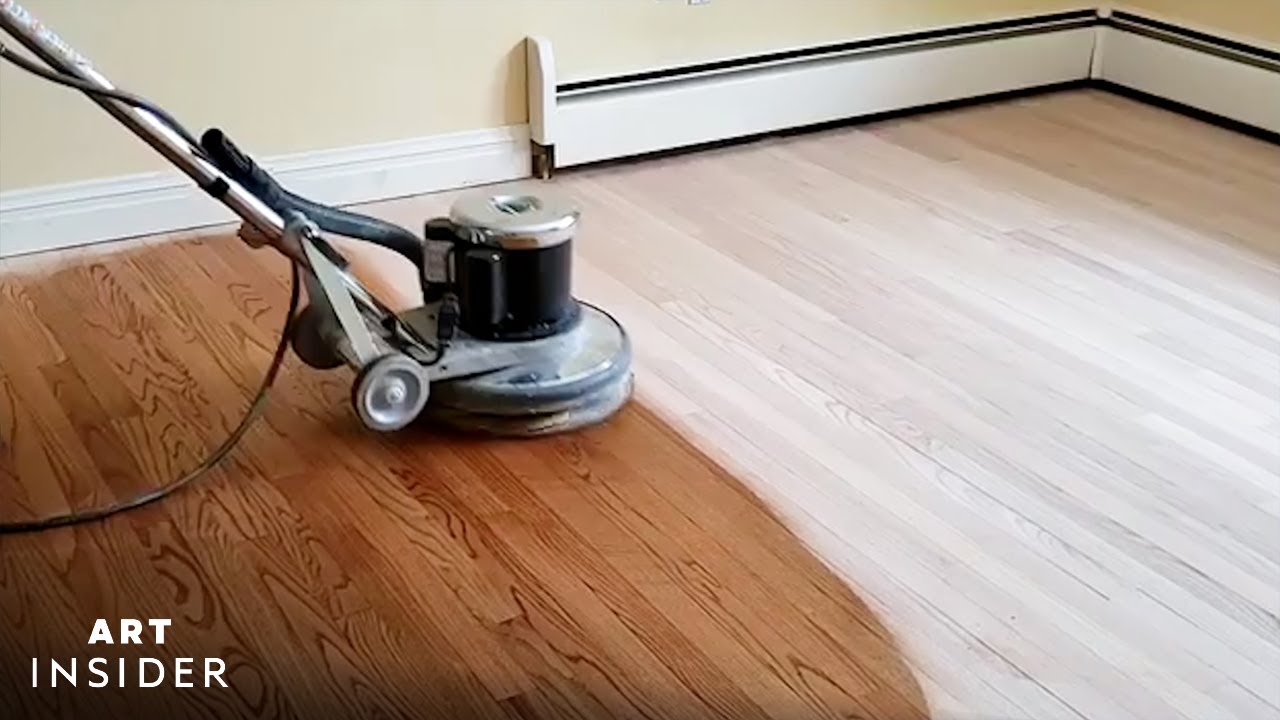
Hardwood Flooring Refinish
Once set up, think about redecorating your brand-new wood floors after numerous years:
- This procedure brings back the original appeal without needing complete replacement.
Benefits of Refinishing
Increases longevity. Enhances looks by getting rid of scratches and dullness.FAQ Section
1. For how long does hardwood flooring setup take?
The period depends on the area dimension and intricacy however commonly varies from one day to a week.
2. Can I install wood floorings myself?
Yes! With the right tools and techniques detailed below, DIY setups are totally feasible!
3. What types of finishes are available after refinishing?
Common finishes include oil-based polyurethane and water-based alternatives; each has its advantages and disadvantages relating to sturdiness and drying out time.
4. Ought to I work with specialists or do it myself?
If you're certain in your abilities or have prior experience with woodworking-- even much better! If not, professionals make sure quality results.
5. Is maintenance called for after installation?
Regular cleansing with proper items will keep your floorings looking beautiful; stay clear of water damages whatsoever costs!
6. What's the best means to cleanse my recently installed hardwood floors?
Use a microfiber wipe together with specialized cleaners created especially for hardwood surfaces!
Conclusion
In summary, successful hardwood floor installment hinges on recognizing both innovative devices and effective methods customized to improve effectiveness throughout the entire procedure-- from preparation via ending up touches like redecorating when needed. As you embark on your next flooring job equipped with this knowledge-- and maybe even some new devices-- you'll discover that not just will you achieve magnificent results however additionally take pleasure in every step along the method!

By leveraging these understandings right into ingenious tools and methods for reliable hardwood flooring installment, you're well on your method to producing stunning rooms that stand the examination of time! Whether you're putting down new floorings or planning a redecorate down the line-- get ready to craft something genuinely special!